
|
|
. |
Red Jeep Club's collection of Technical Jeep and 4x4 related articles
Yaesu FT2500 Ham Radio Install in a Jeep Wrangler
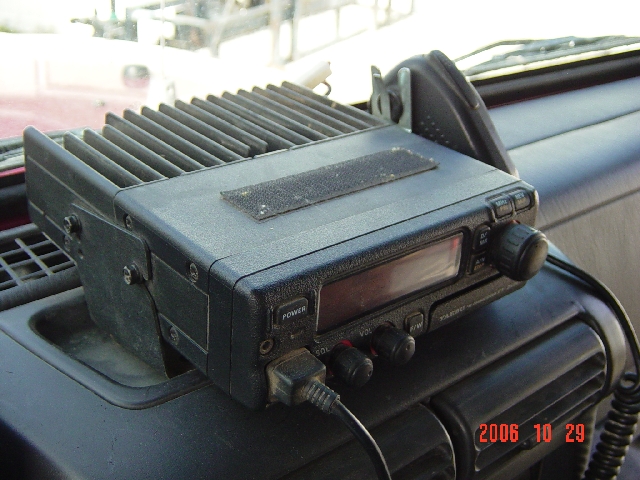
So to make a long story even longer we got interested in Amateur Radio, or Hobby Amateur Radio (HAM) Radio. We discovered that with a bit of study and by following a few rules we had a fantastic communication system for our mobile adventures. We all started with a Technical no code plus license, and handie talkies. A handie talkie is a hand held Ham radio that is great for using while moving around. It's like a walkie talkie you had as a kid. You can take it with you just about any place you go. unlike you CB walkie talkie s HAM handie talkie is a small and full featured Ham Radio with a small rubber antenna, or a "Rubber Duck" antenna. These can be used in a car or Jeep and do an ok job of communicating with the Ham radio repeater system. One problem with use a handie talkie in a car is when you are sitting in a car you are sitting inside a tin can. The doors and top are usually made of metal and reflect the radio waves transmitted by your handie talkie right back into the car. What you really want to do is send the radio waves out of the Jeep and long distances away. A good solution is to upgraded to roof mounted antennas. Two type of exterior car antennas are available, one called a "Mag" mount and another type that is hard mounted. A Mag mount antenna is an antenna mounted to a big metal attracting Magnet. You install the antenna to the magnetic base and just plop it on the top of your Jeep roof or hood, run the wire in to the radio in the Jeep and connect it. Your ability to communicate has more than double with this simple upgrade. The best option is to upgrade your handie talkie to a "Mobile" HAM Radio. A Mobile radio is one that is designed to be used in a Jeep or vehicle. They typically have a more power for transmitting, usually up to 50-60 watts, vs. 5 watts maximum on a handy talkie. A Mobile HAM radio is also built to run on a 12 volt power source to match the power and batteries in you Jeep. Combine this with a roof top HAM antenna and you are all setup to communicate for hundreds of miles with friends family. As a side note HAM radio supports many different channels and frequencies, each with there own capabilities, and advantages and disadvantages. I won't go into that here, I will just mention that all the radios and equipment I am showing here is 2 Meter HAM radio equipment. The 2 Meter band is in the frequency range of 145.00 - 148.00 mega hertz. This only one of the many bands you can operate on as a licensed HAM radio operator. HAM radio operators are not limited on the power that they are allowed to transmit. So unlike CB you can turn it up and use as much power as need to make the connection. The 2 meter frequencies are good for communicating at a range of about 50-100 miles, ad in the repeater systems and you can double or even triple that with ease. A repeater is an antenna and radio place on top of a hill or tall building that receives and transmits or repeats a HAM radio signal. So you can talk into a repeater and it will re broadcast the signal a longer distance with more power than you may have. HAM radio repeater are put up by many different amateur clubs and organizations. Many of them are used for emergency communications and emergency communications planning. Now on with the mobile radio install. I examined the dash and interior of my Jeep Wrangler and determined that I don't have a lot of extra space in the dash or front panel to work with. I concluded that I had about 2 options. Option 1 mount the radio in a vertical position at the front of the center panel in front of the area where the stick shifter for the transmission is. Or option 2 set the radio on the top of the dash above the center console area. or Option 3) (Added later when I installed a full roll cage in the Jeep) mount it on top of the cross bar for my full roll cage. (This is how I mounted my CB radio, I had to install one so I could trail lead for the Utah Four Wheel Drive Association U4WDA). or Option 4) make a nice custom over head console to mount the radio above your head between the driver and passenger front seats. I made a mount like this for one of my buddies Jeeps and I will explain that later. Option 1. This is how I installed the radio in my Jeep. This option is to place the radio on top of the dash. To do this I removed the rubber pen tray or whatever you would call it. I then added a big strip of Velcro to the base of the Jeep dash. I used the soft side of the Velcro. On my Yaesu FT2500 radio I installed the mounting base with the supplied screws and brackets. I adjusted the angle so the the radio was nice and level with the dash and easily accessible from either the drivers or passenger seat. I then added another big strip of Velcro to the bottom of the bracket that is mounted to the radio. This make the Radio easily removable. I can grab the radio and the microphone and remove it without much fuss. The Antenna wire is connected and the power cable is connected. The power cable has a quick disconnect plug about 6 inches from the radio so this is nice and easy to remove. The antenna wire can be un screwed in a few seconds and the radio is ready to go inside to your HAM shack. (NOTE: I was having an issue with the ground or the connection or the cable or something on the radio. It was having bad intermittent connection and static, so I created a new body mounted antenna system and bought a new cable. In an effort to solve the problem I screwed the cable and connectors into my radio with pliers. So my radio is no longer quick connect, But it was at one time.
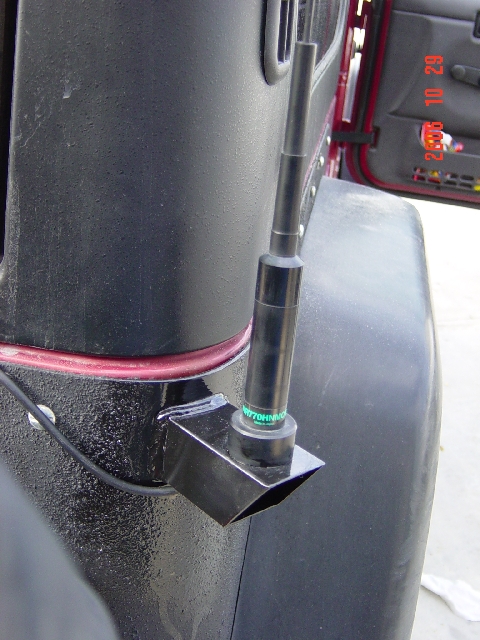
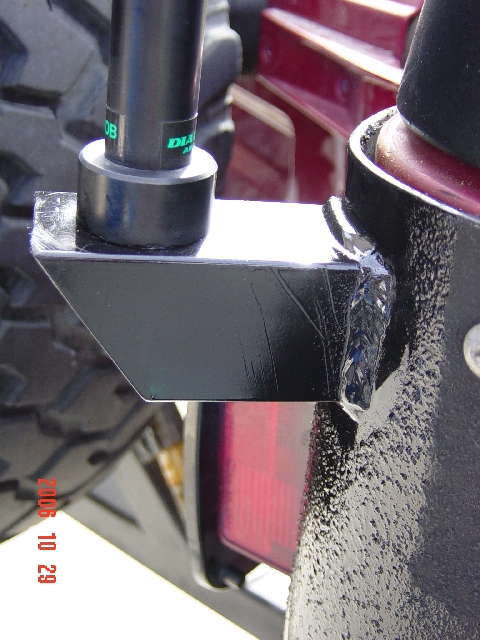
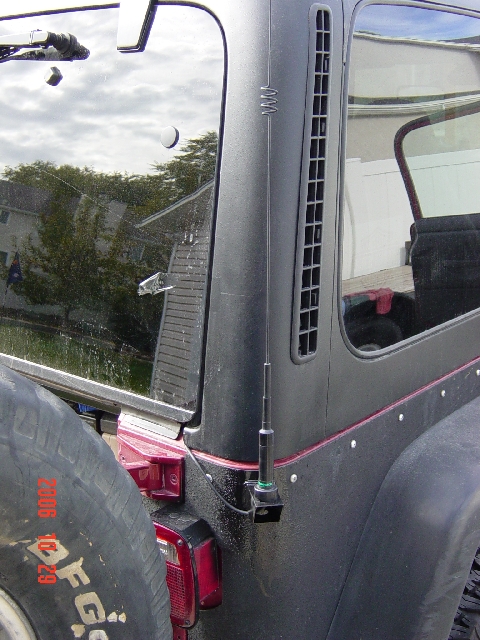
As I mentioned above, this is my new Antenna mounting system. I was having static issues with my MAG mount antenna on my hood so I created a permanent mount on my fender. A a side not I must confess that I am a welder and I created this bracket and welded it to the quarter panel guards that I also created. Most Jeep owners would not be willing to weld a mount to the side of their new Jeep. For your rescue an aftermarket company has a bracket that can be place under the rear tail light that is designed to hold an antenna. This Bracket places the antenna in about the same position as I have it here.
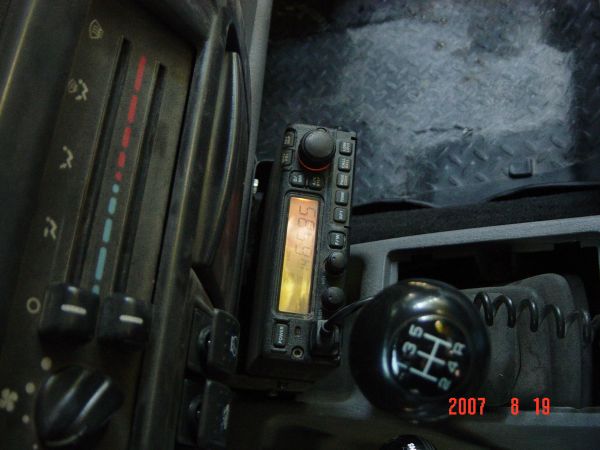
Option 2. Mounting to the front of the center console. This is a nice out of the way place that still provides good access to the radio for operation, just remember to keep you eyes on the road not on the radio when driving.
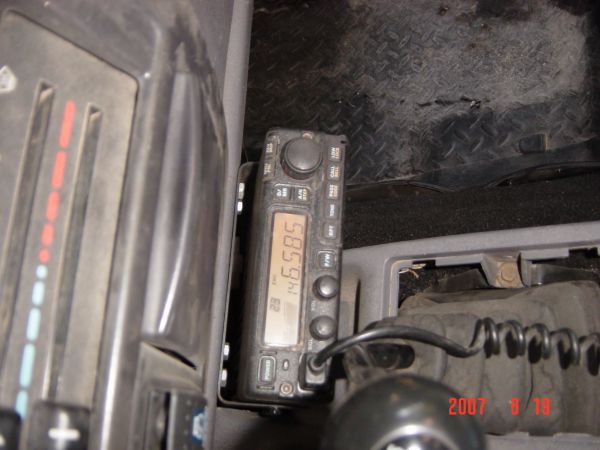
Here are a few shots of the Radio mounted right up against the dash in front of the Shifter. The center console of the jeep was trimmed out to accommodate the HAM Radio in this position. I like the install, it's clean and easy to operate why four wheeling.
Here I turned on the flash, it washed out a bit but I think it helps.
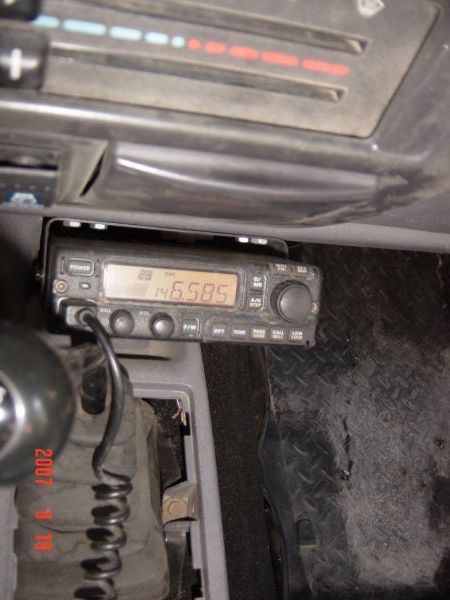
I guess this is a better view, but you got the idea from the other pictures. The microphone does need a home, I am not sure where the clip to hold the microphone was placed. Maybe up on the dash near the steering wheel closer to the drive.
|
||||||||||||||||
 NOTE: My email address is shown here in the picture with my Jeepin Dog. I had to put it in a picture so I wouldn't get so much spam email.
If you have questions please email me.
NOTE: My email address is shown here in the picture with my Jeepin Dog. I had to put it in a picture so I wouldn't get so much spam email.
If you have questions please email me.