
|
|
. |
Red Jeep Club's collection of Technical Jeep and 4x4 related articles
My Off Road Jeeping Trailer Part 7Off Road Trailer Build Page 1, Page 2, Page 3, Page 4 Page 5 Page 6 Page 7 Page 8 Page 9 Page 10 Page 11 Page 12 Page 13 Page 14 Page 15 Page 16 Here is a shot of the front spring mount which is built and welded hard into place. I boxed around the base of the hanger. These are springs off a Jeep Cherokee XJ. I have reversed the way the shackle and the spring mount on the project. I am hard mounting the front of the spring to the front of the trailer box. I built my own mounts as you can see. I used 3/16 flat plate steel and cut them out and cleaned them up with a grinder. I then drilled a hole in them and I am using the Stock XJ bolts. This little system seems to work really well. This part did take a lot of time. I need and iron worker with a sheer and a few good punches. Wouldn't that be nice.
I added a scrap piece of steel for the lower boxing. This will add some extra strength to the whole package. I then finished up the welds and cleaned them up with a grinder. They mount right to the front of my trailer box.
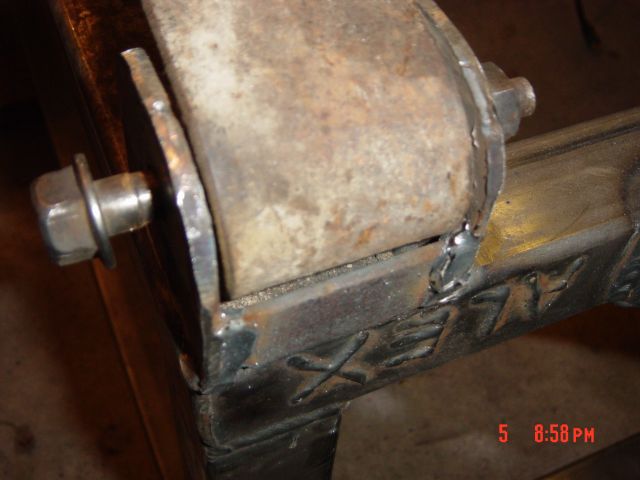
Here is the other side, as you can see I did the same thing. This time my 4 year old got in on the action and completed one of the welds with me. I then put his name put his name on the trailer box. He was very proud to see his name in weld.
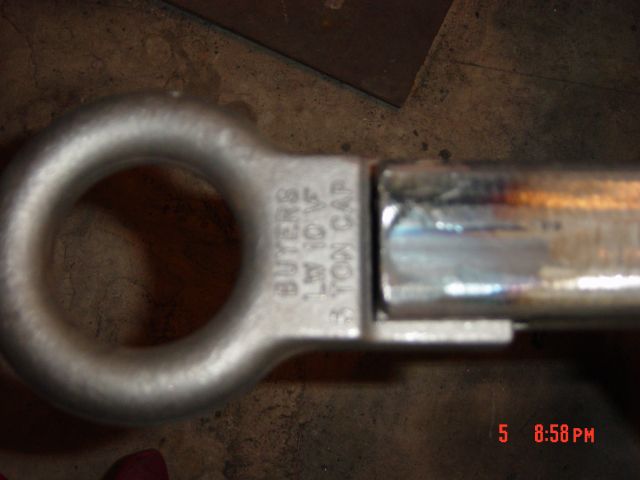
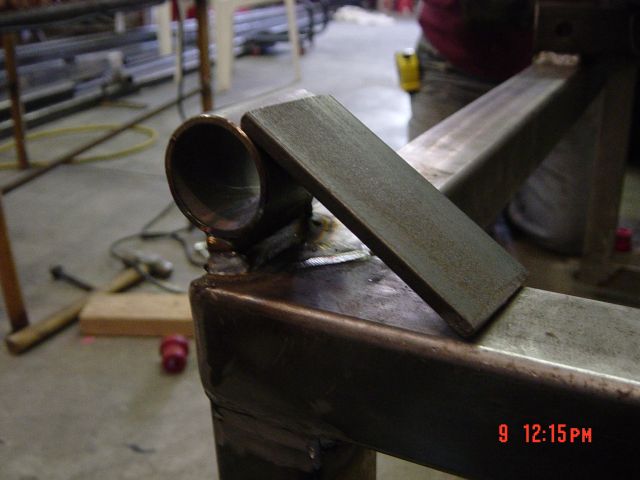
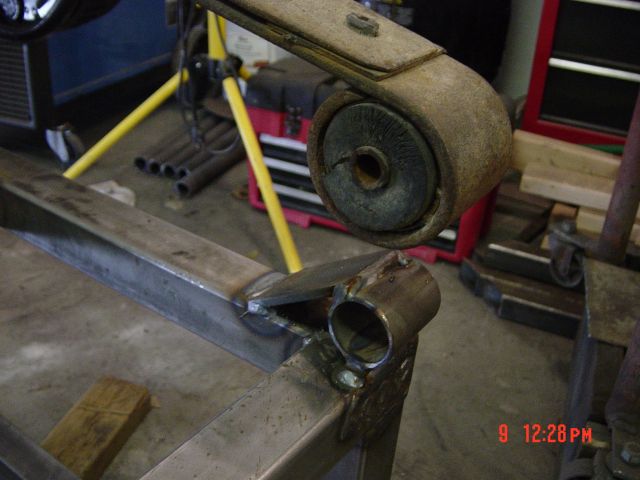
Now on to working on the tongue. Here is a top view (sorry it is a bit blurry) of the Lunette that I am going to weld into the 2x2 tongue piece. Then next photo is a lot better.
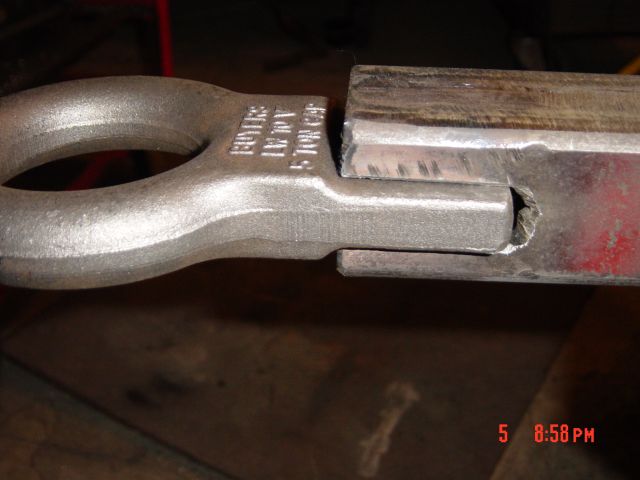
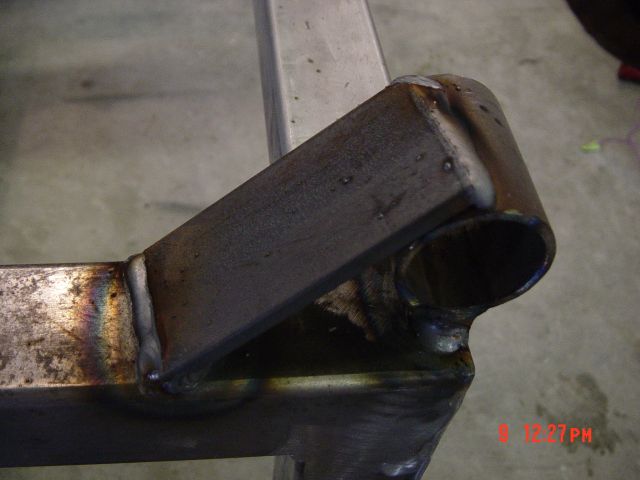
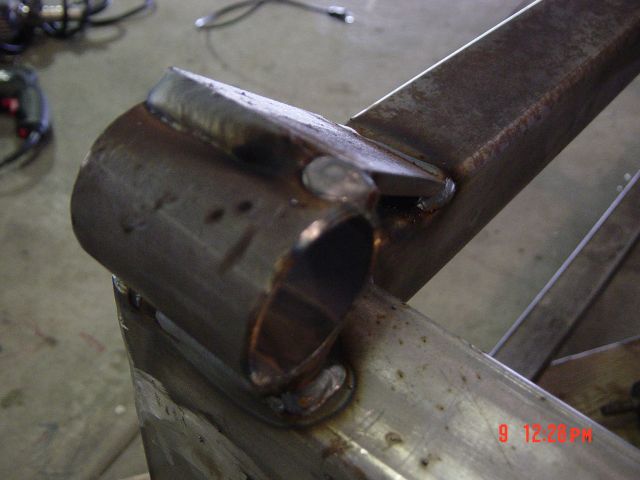
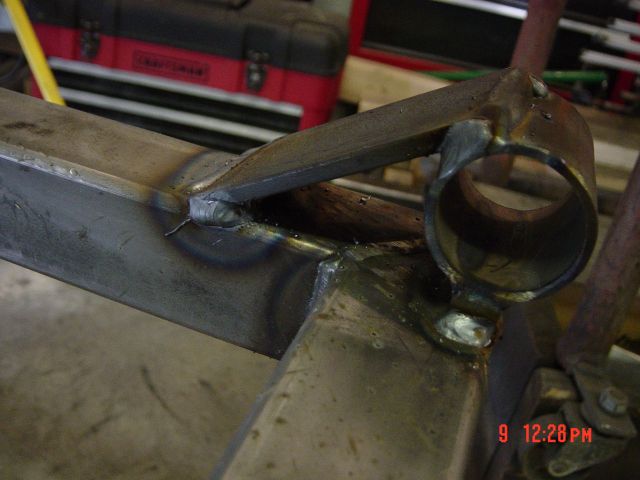
This shows a side view of the way I notched the Lunette in to the 2x2 square tube. I cut the notches out with my Plasma cutter and was very impressed with the results. I cleaned then up a little bit with the grinder and then welded every surface that was exposed with a really hot setting on my Mig welder. The lunette was cast steel which you can weld to really easily, I was initially thinking it was cast iron and I needed special welding rod and needed to use my ARC welder but that is not the case.
Here is a picture of an idea for a read shackle mount. This is not what I ended up using. These are some small shackles I got at the trailer supply store. I got them hoping I could save myself a few extra hours. I ended up making my own shackles and saving these for another project.
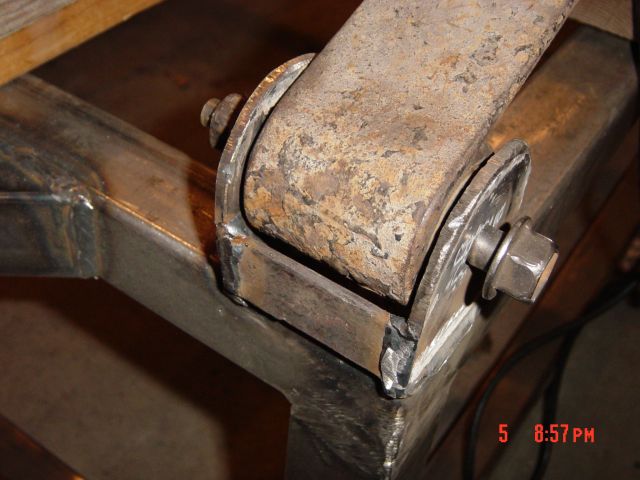
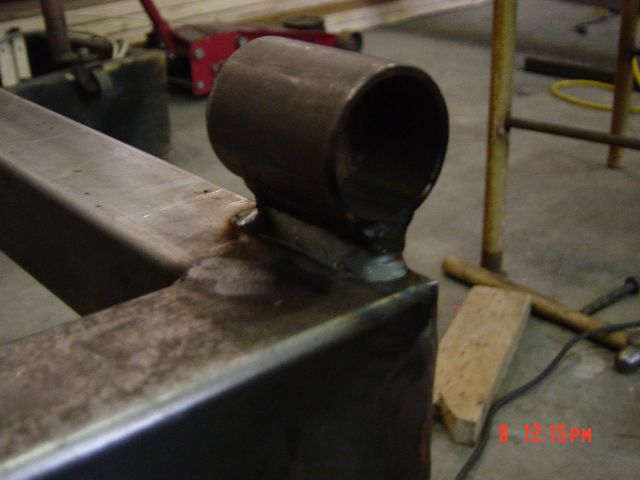
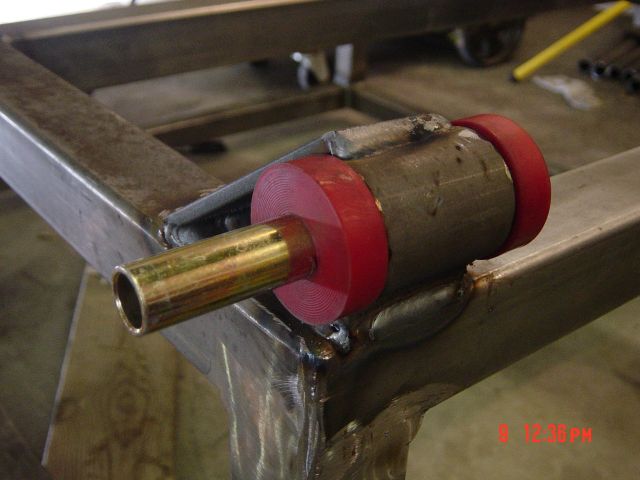
So I figured out how I was going to add the rear mounts for the spring shackles. I wanted to use a piece of DOM 1.75 with .120 wall thickness. I went down to a local Jeep shop and got a set of bushings and bolts and inner support liners so the bolt won't crush the bushings. Once I found the placement for these on the back of the trailer I realized that I needed to raise the mount off the frame so the shackles won't rub. Plus it gives the rear another 1/2 an inch of lift. so I welded a piece of 1/2 x 1/2 box to the DOM tube and then welded it to the trailer.
As you can see nice hot welds so I am not worried about them breaking. But this mount looked like it was hanging out alone so I mastered a plan to add some supports.
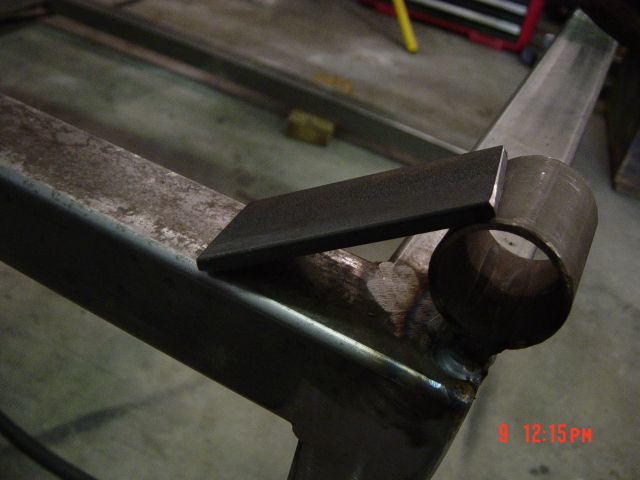
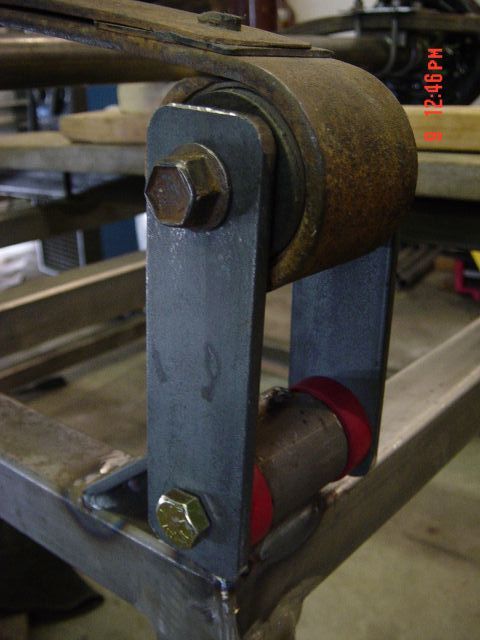
I cut a piece of 2 x .25 about 6 inches long and angled it so it would add a nice bit of strength and make it look better.
Here is another view front the front and side.
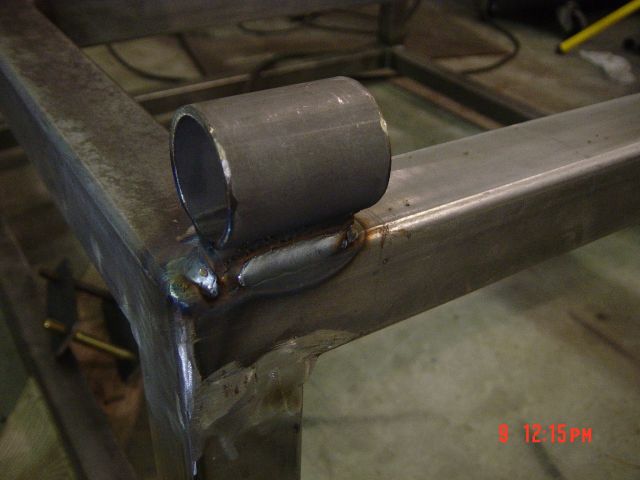
Once I burned it on, the mounts for both sides are done and will be strong enough to hold the weight of this little trailer.
Nice Welds, I am really impressed with my little welder. Well maybe it's not a little welder It's a Millermatic 210 which seems to be working really well for me now. It does a good gob and I am certainly getting better with it. To become a good welder get good equipment and do a lot of welding.
The heat circles are cool to look at, shows the welds are hot.
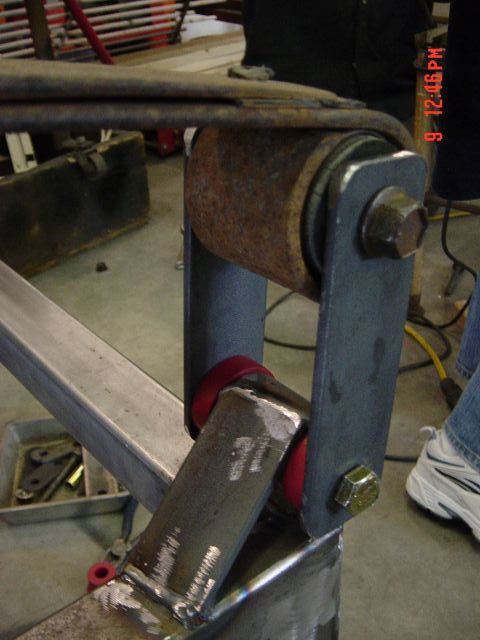
This shows the final placement of the mount and the spring, Now I just need to build the shackles.
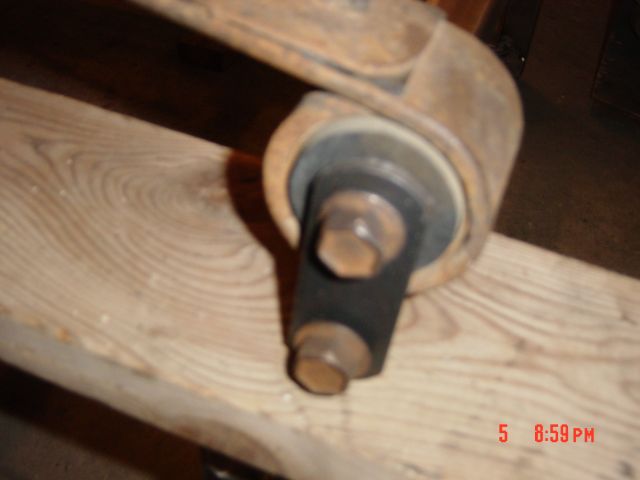
Adding the bushing was done with a little placement and a big hammer. Here is a pictures of the rear trailer shackle getting installed into the mounts I just welded.
Whammo, the shackle is done. I think I made the shackles 7 inches long with 5 inches between the bolt hole centers. I was going to put a cross piece in the middle of the shackles but some how I just bolted them up and moved on thinking about a brace later. I may come back to this at a later date. We shall see, I'll just put it on the top of some day list.
Not too bad, if I say so myself.
Off Road Trailer Build Page 1, Page 2, Page 3, Page 4 Page 5 Page 6 Page 7 Page 8 Page 9 Page 10 Page 11 Page 12 Page 13 Page 14 Page 14 Page 16
|
||||||||||||||||
 NOTE: My email address is shown here in the picture with my Jeepin Dog. I had to put it in a picture so I wouldn't get so much spam email.
If you have questions please email me.
NOTE: My email address is shown here in the picture with my Jeepin Dog. I had to put it in a picture so I wouldn't get so much spam email.
If you have questions please email me.